> ## Documentation Index
> Fetch the complete documentation index at: https://docs.4minds.ai/llms.txt
> Use this file to discover all available pages before exploring further.
# Explore the Model Dashboard
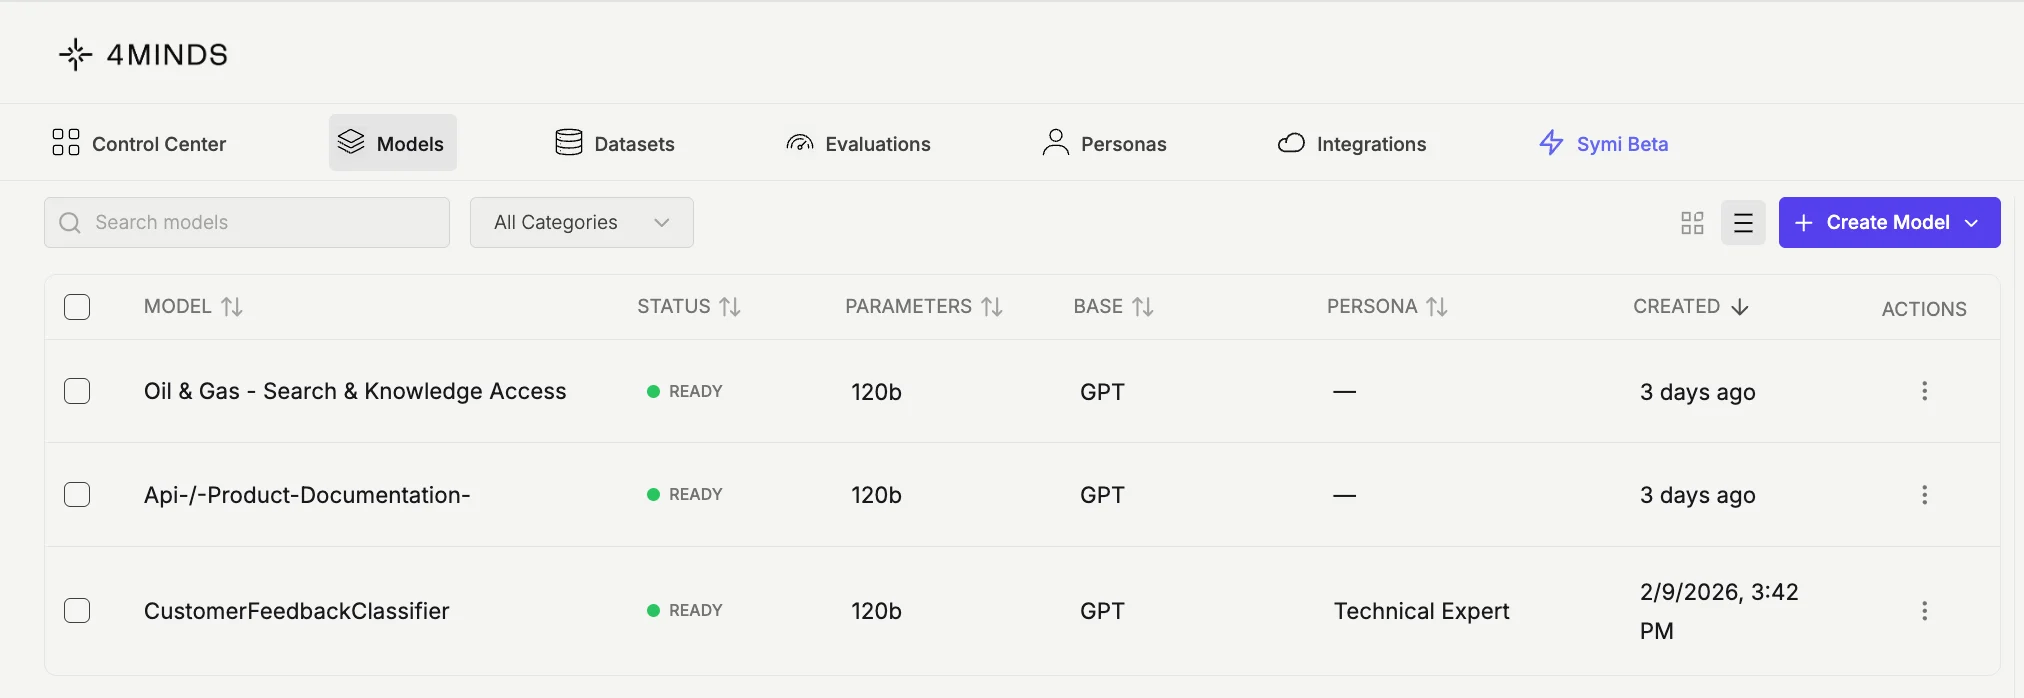
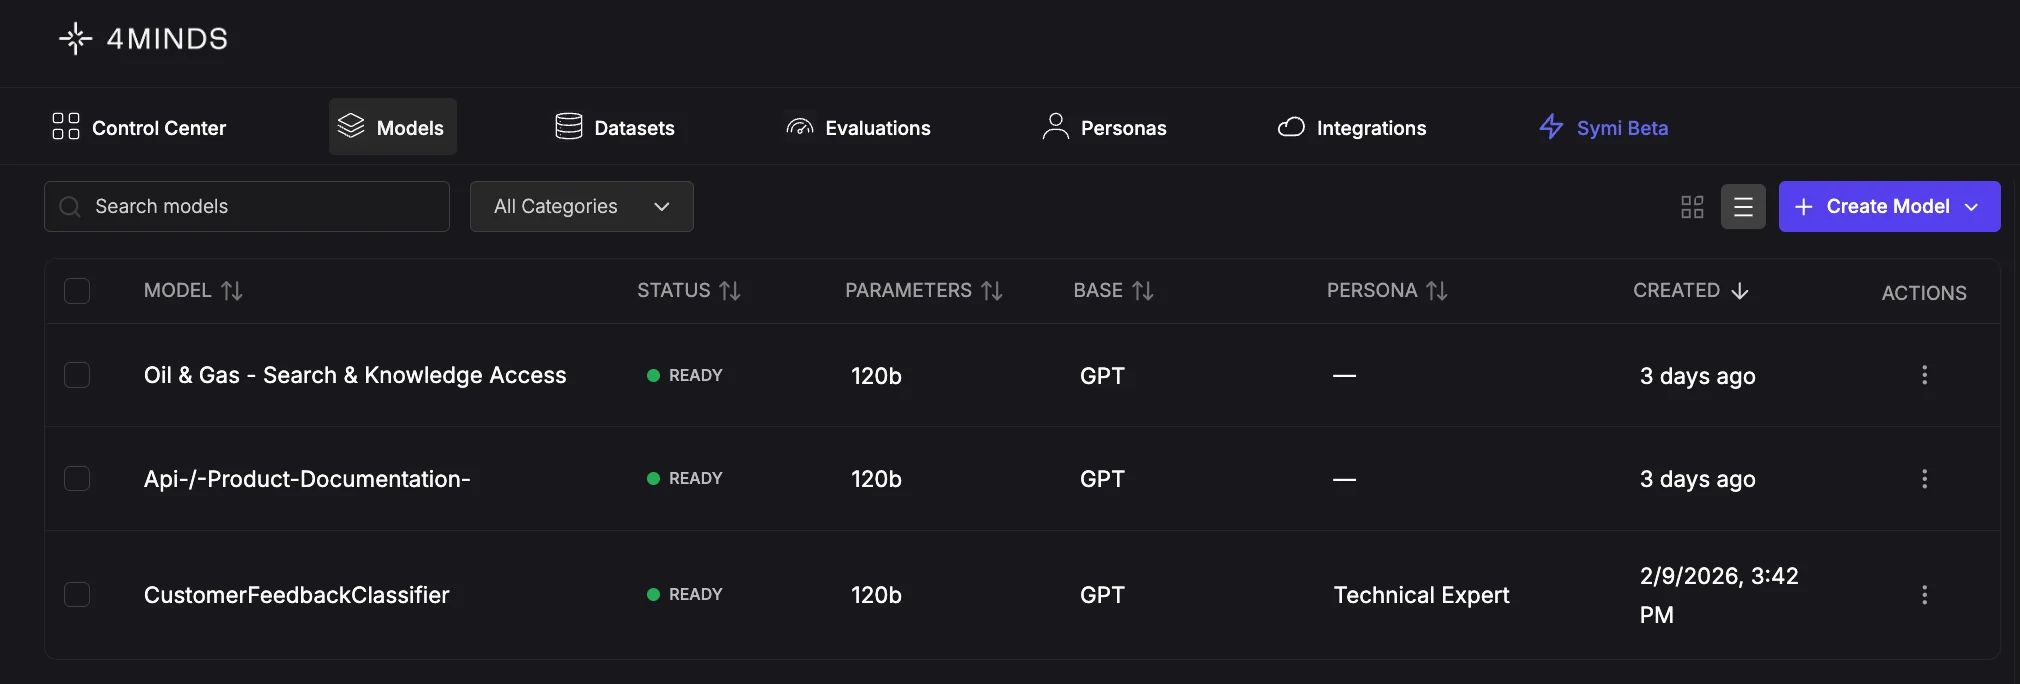
> A model is a machine learning system — typically a large language model (LLM) — that's been trained on data to recognize patterns and generate responses. In the 4MINDS platform, you can create personalized models adapted to your organization's specific data and use cases. The Model Dashboard displays all your models with their current training status. View key performance indicators at a glance: number of models ready for deployment, token processing speed, average response time, and success rate across requests. Click any model to view detailed metrics and configuration settings.
 ### View Options
Toggle between two display modes to suit your preference:
* **Card view** - Visual grid layout showing models as cards
* **Table view** - Compact tabular format for detailed information
### Base model
When deploying directly on 4MINDS, your custom model runs on `gpt-oss-120b` — no in-platform base-model picker.
**Direct base-model selection has been deprecated.** To use other foundation models, connect an external provider — see [Creating a Model in Advanced Mode](#creating-a-model-in-advanced-mode) below for details.
### Creating a Model in Advanced Mode
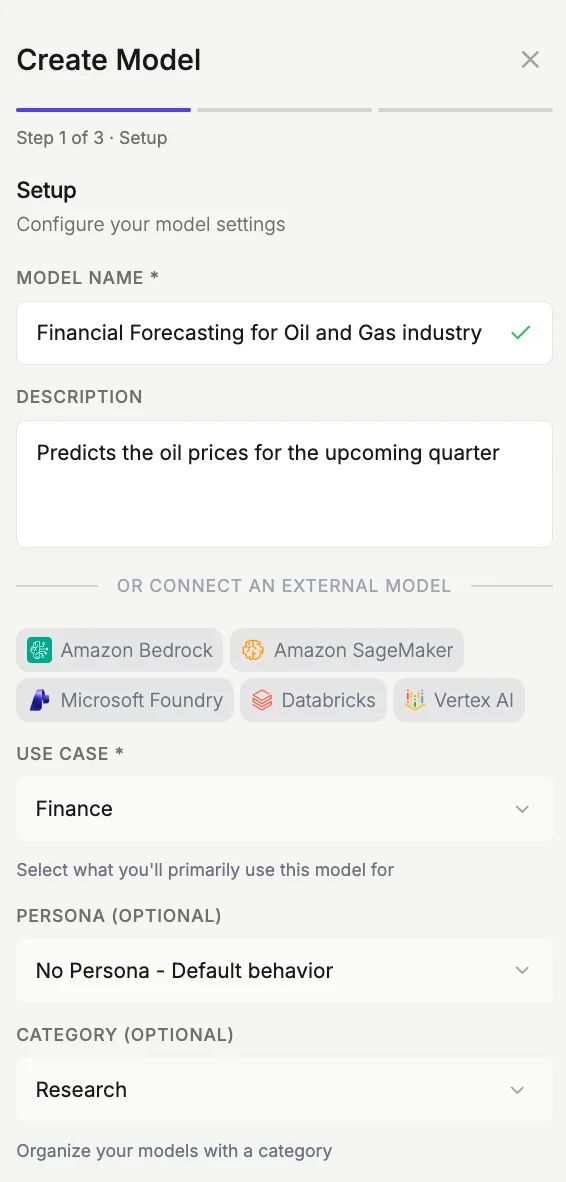
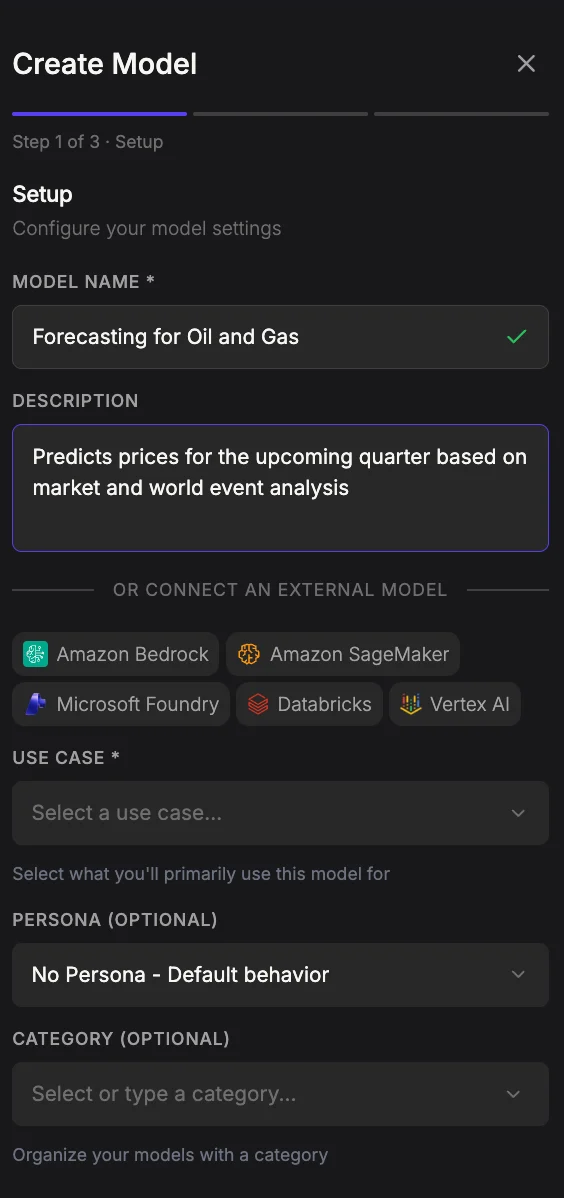
1. **Step 1 of 3 — Model Settings.** Click the ‘**Create Model**’ button and select ‘**Advanced Mode**’ to begin creating your model. Configure the basics for your model, then click '**Next**':
* **Name** *(required)* — Enter a name for your model.
* **Description** *(required)* — Briefly describe what the model is for.
* **Use Case** *(required)* — Select the use case that best matches your model's purpose.
* **Persona** *(optional)* — Apply a persona to shape the model's tone. See [Personas](/persona-configuration).
* **Category** *(optional)* — Tag the model with a category for organization.
* **Base model / External provider** — By default, the model runs on **`gpt-oss-120b`**. To use a different foundation model, select an externally connected provider (e.g. [Amazon Bedrock](/bedrock), Google Vertex AI, [Amazon SageMaker](/integrations#amazon-sagemaker), or [Microsoft Foundry](/microsoft-foundry)) — see [Add Integrations & Data Sources](/integrations) for setup.
### View Options
Toggle between two display modes to suit your preference:
* **Card view** - Visual grid layout showing models as cards
* **Table view** - Compact tabular format for detailed information
### Base model
When deploying directly on 4MINDS, your custom model runs on `gpt-oss-120b` — no in-platform base-model picker.
**Direct base-model selection has been deprecated.** To use other foundation models, connect an external provider — see [Creating a Model in Advanced Mode](#creating-a-model-in-advanced-mode) below for details.
### Creating a Model in Advanced Mode
1. **Step 1 of 3 — Model Settings.** Click the ‘**Create Model**’ button and select ‘**Advanced Mode**’ to begin creating your model. Configure the basics for your model, then click '**Next**':
* **Name** *(required)* — Enter a name for your model.
* **Description** *(required)* — Briefly describe what the model is for.
* **Use Case** *(required)* — Select the use case that best matches your model's purpose.
* **Persona** *(optional)* — Apply a persona to shape the model's tone. See [Personas](/persona-configuration).
* **Category** *(optional)* — Tag the model with a category for organization.
* **Base model / External provider** — By default, the model runs on **`gpt-oss-120b`**. To use a different foundation model, select an externally connected provider (e.g. [Amazon Bedrock](/bedrock), Google Vertex AI, [Amazon SageMaker](/integrations#amazon-sagemaker), or [Microsoft Foundry](/microsoft-foundry)) — see [Add Integrations & Data Sources](/integrations) for setup.
 ###
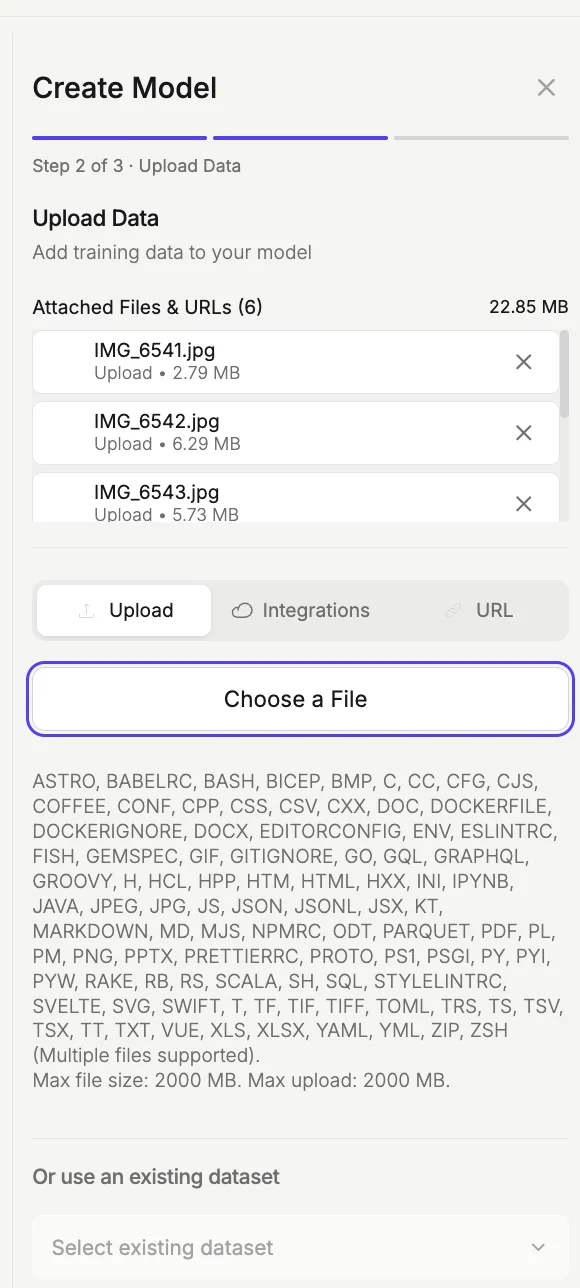
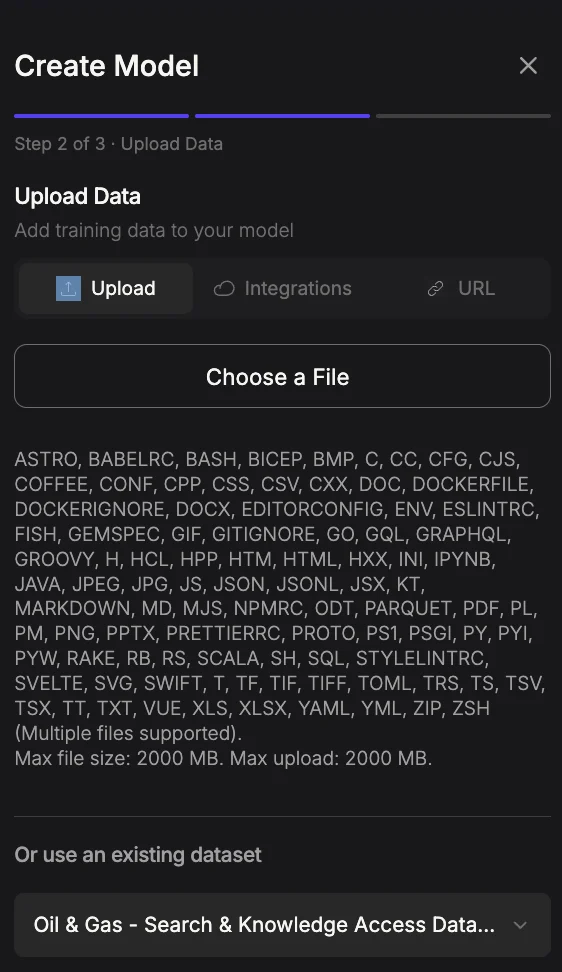
2. **Step 2 of 3 — Upload data.** Add training data to your model. Select a data source using the tab selector at the top, or pick a pre-existing dataset from the **Or use an existing dataset** dropdown at the bottom.
Available data source tabs:
* **Upload** *(default)* — Select local files using the **Choose a File** button. Multiple files can be uploaded at once. Supported formats include:
* Data: CSV, TSV, PARQUET, JSON, JSONL
* Documents: PDF, DOCX, MD, TXT
* Code: PY, JS, TS, SQL, and many others
* Archives: ZIP
Maximum file size is **2,000 MB**, with a total upload cap of **2,000 MB**.
* **Integrations** — Pull data from a [connected integration](/integrations) (e.g. Hugging Face, S3, Google Drive).
* **URL** — Import data from a public web URL.
Click '**Add Files**' to attach the selected files to the model.
###
2. **Step 2 of 3 — Upload data.** Add training data to your model. Select a data source using the tab selector at the top, or pick a pre-existing dataset from the **Or use an existing dataset** dropdown at the bottom.
Available data source tabs:
* **Upload** *(default)* — Select local files using the **Choose a File** button. Multiple files can be uploaded at once. Supported formats include:
* Data: CSV, TSV, PARQUET, JSON, JSONL
* Documents: PDF, DOCX, MD, TXT
* Code: PY, JS, TS, SQL, and many others
* Archives: ZIP
Maximum file size is **2,000 MB**, with a total upload cap of **2,000 MB**.
* **Integrations** — Pull data from a [connected integration](/integrations) (e.g. Hugging Face, S3, Google Drive).
* **URL** — Import data from a public web URL.
Click '**Add Files**' to attach the selected files to the model.
 * Click '**Next**' to proceed to the next step.
3. **Step 3 of 3 — Review.** Verify your configuration before model creation begins. The review screen shows a read-only summary of the choices made in the previous steps in a two-column label/value layout:
| Field | Description |
| --------------- | ------------------------------------------------------------- |
| **Name** | The model's display name (e.g. "Forecasting for Oil and Gas") |
| **Description** | Brief summary of the model's purpose |
| **Base Model** | The underlying foundation model (e.g. `GPT-OSS-120B`) |
| **Use Case** | The intended application domain (e.g. "Finance") |
| **Persona** | The assigned persona, or `None` if not configured |
| **Category** | The classification category for the model (e.g. "Finance") |
| **Dataset** | The training dataset selected in Step 2 |
Review each field for accuracy. To correct a value, navigate back to the relevant step. When everything looks correct, click ‘**Create Model**‘ to finalize your model creation.
* Click '**Next**' to proceed to the next step.
3. **Step 3 of 3 — Review.** Verify your configuration before model creation begins. The review screen shows a read-only summary of the choices made in the previous steps in a two-column label/value layout:
| Field | Description |
| --------------- | ------------------------------------------------------------- |
| **Name** | The model's display name (e.g. "Forecasting for Oil and Gas") |
| **Description** | Brief summary of the model's purpose |
| **Base Model** | The underlying foundation model (e.g. `GPT-OSS-120B`) |
| **Use Case** | The intended application domain (e.g. "Finance") |
| **Persona** | The assigned persona, or `None` if not configured |
| **Category** | The classification category for the model (e.g. "Finance") |
| **Dataset** | The training dataset selected in Step 2 |
Review each field for accuracy. To correct a value, navigate back to the relevant step. When everything looks correct, click ‘**Create Model**‘ to finalize your model creation.